Sunday, January 27, 2013

Open Floor Time 1-26-13

Phew. Just when you think you've got it, you introduce something difficult and he does that with ease too! Then you try to do the weaves and he suddenly doesn't want to do that at all... Maybe I over worked it? You tell me.

Our course yesterday. Special thanks to my new phone that can take panorama shots.

I spent the night at U of M and then headed home Saturday morning to get some training done. My BRAND NEW IPHONE said it would take an hour to get home. Made it in 45 minutes. Whose the winner now? I picked up Marie and Pepper and off we went. He cried the whole way there because he is a cry baby all the time now.

iPhone photo shoot!

Yesterday was the day that we were going to start doing contact training on the A-frame and dog walk. Very exciting. And I was worried. The teeter is no problem but the A-Frame and dog walk are slippery. Pepper is really agile but he is also old. At this point, I'm not sure he'll be able to do the A-frame at full height. He must also be really careful on the dog walk. The one we have in class is covered with a better material that is more grippy but I'm still concerned. 

At the beginning of the dog walk.

We are officially signed up for the Trial in March so we've got to step our game up. We shan't embarrass ourselves in front of everyone. That means no more wussing or loafing about in class. I'm going to request the weaves be put a lot closer this week. Its week 4 so we need to be farther along anyway. I guess other than that we can't "hurry up" our class. We have to move at everyone else's pace. Mayhaps I will also request that we be paired with the pitbull, Milika. She is learning faster than the other dogs and is the closest to Pepper's level.

The dreaded curved tunnel!

I'm guessing that we will use the lowered teeter in class this week. I feel like I'm always speculating this but this week I'm 75% sure! Pepper learned to use the full height teeter this week so I don't see any problems arising there. And I think we might introduce the dog walk. Pepper and I will be working from our right side as much as possible in class. If we can help it, I want to do no left-sided work at all!

  
I apologize for this video being one million years long.

I have 95$ worth of quarters in the back of my car that will serve as our offering for the Intermediate Agility. We sign up next week! Now I can afford another class session without dipping into my precious savings. The previously mentioned savings are now being used to pay off my car and my brand spanking new iPhone5. Well worth the cash considering I need a car to get around and an iPhone to record our session/remain cool.

Tuesday, January 22, 2013

Beginner's Agility Week 3

I know I've been silly about posting videos on random days but I'm here to put a stop to that! Officially, Class videos and posts will be done either Tuesday night or Wednesday day. Open Floor Time videos and posts with be done either Thursday night or Friday day. Trials or extraneous nonsense can be posted anytime but probably will be done up on weekends.

Anywhoodles, this weeks class went AWESOME. I feel like I say that every week but really, this class was great. We did a lot of our work on the off side (Pepper on my right). Generally we fail at this. Last week's video totally proved that. This week was an un-fail AKA beautifully done. Also, every single dog ever registered for class came so we got plenty of them on our video this week. The ring was pretty crowded but we still managed to get 2 sequence runs in.


Overall, we need to work on the curved tunnel. Pepper likes to refuse it sometimes for seemingly no good reason. I also want to introduce the dog-walk and A-frame. I don't want to rush things but there is a competition in Lapeer from March 1st-3rd (We will be there on the 2nd, if we attend). I really want to enter it but I don't think I will send my money and registration in until we do this Thursday's Open Floor work. I want to see how he does on the dog-walk and A-frame. I will be introducing those and hopefully doing some finishing touches on the weave work. I think we are past the wide open channel and could probably work a very small, wiggly channel at this point. It really all relies on what Pepper does this Thursday.

If we do enter in the competition, it will be in the Standard Novice Preferred class. That means Pepper, 22" at the shoulder, will jump 16" and will run a standard course with 6 weave poles in it. I got a little over excited about todays class so maybe I will reconsider later this week but I am 85% we are going for our first trial in early March. Just 4 months after we started seriously training.

Am I crazy?

Yes.

Check out the premium. Maybe I will see you there!

Monday, January 21, 2013

Pepper Can Do That!

The Michigan Winter Dog Classic was this weekend. Of course, I wanted to go. There were going to be confirmation events, rally, obedience, and even some agility competitions. But best of all, there was a chance to bring Pepper to his very first dog show. And there was an agility seminar for him to do whilst there!

OMG been waiting in line for like an hour (literally). Do I look annoyed or what?

Pepper made lots of friends while we waited for a million hours for our turn. We met a 9 month old Corgi, a tiny Border Collie, another Aussie, and an assortment of small dogs/terrier animals. My little sisters came into the ring to do a little work themselves. Susan especially wants to do some work with Pepper. I figured, hey, why not? Pepper was extremely well behaved during the whole show. He wore his head-collar for like 5 minutes before he settled down and I put on his buckle collar. I wish we could have been off leash in the ring but there were other dogs/the ring wasn't fully closed. Can't have Pepper potentially terrorizing the entire dog show...

Pepper does the table because he is a champion. Marie and Susan watch us expectantly.

After our escapades in the ring we got to see the pros do agility just down the row. That was pretty cool. I was almost positive Pepper could do it. The course didn't seem terribly difficult though I didn't know was class was running at the time (novice, open, excellent, etc.). While we were in line, one of the trainers from our class recognized and came for a chat. She thought I had brought Pep to do the actual agility course! I wish... We are good in class but we aren't exactly ready yet. After Beginner's Agility is over, I'm going to gauge him and put him in a few fun matches. If we perform well there and well in Intermediate Agility, off to compete we go!


On another somewhat related note, I ordered a "team" sweatshirt. Its unclear if its super cool or super crazy-dog-person-cool. I guess we will find out. Either way I am excited to get that in the mail! I am mulling over the possibility of selling AussieDogAgility merchandise. In the future, me thinks.

Front

Back

We are going to look really professional at matches now.  :P

Beginner's Agility Class Week 2- Bonus Material Included

Week 2 of class proceeded much more quickly than last week. Everyone was ready to go this time. Except the new people. That's right. We had two more dogs join our class. Merlin the Standard Poodle and Piper the white German Shepherd. Merlin ended up peeing in the tunnel and Piper is so shy its scary. She only likes her owner. They had to play catch up all class. In the end they did ok but I think the weave poles will be a problem.

We worked on two new obstacles. The swing board was brought in and a ramp was also set up. The swing board is new to agility in general and we may or may not see it being used in competitions. The ramp was introduced as part of teeter and dog walk training. Pepper breezed it. Because he is a champion. And because he has secretly already seen a teeter!


Surprise, surprise. All that teeter building went to good use. I don't have any evidence of Pepper on our home teeter because we have been practicing when the videographers aren't home. Maybe this week we can catch the elusive teeter practice...

Sunday, January 20, 2013

Teeter Build Part 2

Missed out on Teeter Build Part 1? Check it out here.

So you've got that awesome base painted and ready to go! Expect you don't have anything teetering on it yet... Good news people. I have brought to you the second part of the Teeter Build. And might I say it went very well.
The supplies!

You will need:
  • Eight 1 and 1/2" screws
  • A drill with corresponding bit
  • Four 3/4" pipe fittings
  • One 1/2" galvanized pipe
  • A tape measurer
  • A marker
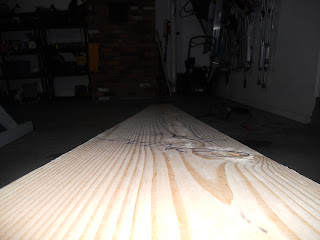
  • One 12' board that is 2" thick and 12" wide

She's a big one!

Measure out your board. Firstly, make sure its the correct length. Its a good idea to actually bring the tape measurer to the lumber yard with you so you know exactly how long of a board you are getting. Secondly, we need to find the middle (6'). Mark the middle and choose the side that will be the "short side". Make about 1"-2" from the center line. By deviating slightly from the center, you can make sure the teeter with favor a side. The "long side" will always rest on the ground, the "short side" will be up in the air until the dog tips it.

Line the pipe fittings up on your "short side" line. I used the galvanized pipe to make sure they all lined up correctly. The end caps for the pipe should be taken off in case you need to make some adjustments or you want to slide the pipe out without disturbing the fittings.

Now you tap the screws in. This way the fittings aren't going anywhere whilst you prepare to drill. Drill in one side of fittings at a time. Make sure that you aren't screwing all the way through the board and onto the topside. Screws + dog paws = no good. After you screw in the first side, proceed onto the other side.

It should end up like this! The fittings are secure but the pipe has sliding room. It will rotate freely without jiggling loose. Slide the pipe out and jockey the board onto the base. Its really nice to have a partner help you with this. I did it by myself and it took like 20 minutes. The board is heavy so be careful lifting it. I suggest balancing the board on boxes so you can slide the pipe through the wood holes into the pipe fittings and out the other wooden hole quickly/way more easily than trying to hold it.

Finished teeter building! Its on its lowest setting (12") because we are still training. 

Next we move onto the painting the board. You will need paints of two different colors.

Supplies:
  • Blue paint
  • Yellow paint
  • Play sand
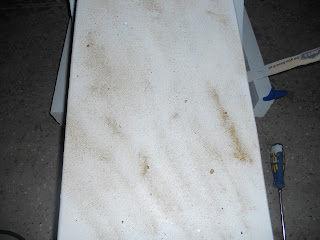
Blue is the board's main color so I put a coat down and then sprinkled the play sand over it. This improves the grip of the board. I would not use this board in icy or slick coniditions. It is meant for ideal weather only. Use your best judgement during outside practice!


Give the first coat an hour or two the come back and put on another coat of paint and sand. Repeat one last time until you have paint, sand, paint, sand, paint, sand, and a last coast of paint. Its like a paint and sand sandwich!

Your teeter is practically finished. Be sure to look out for our final install in the Teeter Build series: Teeter Build Finishing Touches. A Teeter Training post will also be made for your enjoyment.


Saturday, January 12, 2013

Beginner Agility, Class Numero Uno

We learned Spanish!

Just kidding.

Its video we've all been waiting for. The moment of truth. Will Pepper remember everything we've worked on? Will he be able to ignore the other dogs? Am I going to tense up and feint? Will the audience distract him? Will he look just as handsome in fluorescent light?!

Never fear. All these questions will be answered. Right after this video:


Pepper is the star of his class. The trainer even said so. *Proud dog owner moment* There are a few other dogs in his class. There are 5 of us total. The other dogs will make random appearances in our video and hopefully Marie (our photographer/videographer) will be able to take individual photos of all the dogs.


All the dogs doing some work, sorry its blurry...

I was expecting to be surrounded by young Border Collies or maybe even a BC mix thrown in there. I was surprised to see a variety of dogs. No Borders! Weird... Here is a brief description of each of the dogs. I hope this will do until we can get photos up.
  • Dillion- A purebred Doberman Pincher; handsome and very strong, he has no problem pulling his owner around
  • Duke- A little dog mix, Icelandic sheepdog maybe?; wily and rambunctious animal who is still working on basic obedience and now starting agility
  • Brandy- A golden retriever-chow mix, I suspect; the other older dog in the class who is patient, she works really well with her owner
  • Milika- A blue and white pit bull doggy; she is super sweet and loves to jump over the bars, she is a very wiggly pup
  • Pepper- A fantastical beast who appeared when a unicorn exploded into magic dog dust
Car rider to class, he was a sleepy puppy.

Class was great but it also felt short. Part of the class was spent talking dog manners (don't let your dog sniff and yip at the other dogs, its working time not play time!) The trainers promised we would get started right away next time.

Wobble board, some on leash work.
Channel weaves, so fancy.

I am super excited for this upcoming class. We won't be playing with the precursor obstacles but rather working directly with them! I'm also hoping we can lengthen the tunnel and close the weave gap. Pepper and I are also ready for the teeter, I think. Our own teeter might not be complete until next weekend. If we start in class, we can work on the teeter at home. Completing 6 weaves independently and doing the teeter unassisted is part of graduating to Intermediate Agility. I know that not everyone passes on the first try but I think Pep and I can do it!

Teeter Build Part 1

Ever wanted to build your dog a teeter totter? Wow. Its just me. Thats cool. I can teach you how to make one anyway! Today I'm going to show you how to build the base. You are going to need some 2X4s. Three to be exact. And they should be 8' long. You will also need some 3" screws, 3" nails, a metal pipe, pipe supports, end caps, and your sense of adventure!

Cut the wood into these specified cuts:

  • Two 40" base pieces
  • Two 28" post pieces
  • Four 18" brace pieces
  • Two 17" cross bar pieces
 It was so nice today that we could cut the wood outside. That was convenient because hauling 8' of pressure treated wood into the house could have been a hassle.
 Here we are are cutting the four braces. My dad was really helpful. The braces needed to have a 45 degree angle on one side.
 Yay circular saw! (AKA, scary noise maker that could take a finger. Be careful!)
Here are a few of our wood pieces. I label ALL of my wood pieces with their size. Any leftovers? Label those too! "Extra wood, (Insert date here)"

Phew. That was a lot of cutting. Now lets check on our other supplies. We needed all those screws and nails and stuff, right? Yes, yes all of that. But most importantly, you need the metal pipe. It will act as our fulcrum. Eventually, we will attach the 12' long teeter board to that very pipe using pipe supports.

Look at this cool wood screw. Its 3" long!

Here are some of the other requirements:
  • One 1/2" around galvanized metal pipe, 18" long
  • Box of 3" nails
  • Box of 3" screws
  • One 1" drill bit, its a big one!
  • Paint (your color choices/whatever is around the house)
Lets get building!
 Attach the 28" post pieces to the 40" base pieces. Find the very center of the 40" base piece. Mark that, then mark two inches from the center on each side (four inches in total). This is where the 2X4 post piece will go. We used both nails and screws for this. The nails held the pieces steady whilst we screwed. They also add extra strength.
 Next we put the cross bar pieces in. Remember, these pieces are 17" across. The need to be nailed and screwed in on either side of the post pieces.
 Hammer and nail. Drill and screw. Working hard or hardly working.
 Now we are adding the other base and post piece. The cross bars are once again nailed and screwed onto this piece.
 More hammering. More drilling.
 This is the basis of the base. The rest of the pieces are for extra support or finishing touches.
 We are talking about how we want the brace pieces to go in. 45 degree angle was the ticket!
 Whilst we were cutting the braces, my sister, Marie, took this photo to show how the pipe will fit. Looking good so far. The bar goes all the way across with a tiny bit of room. The end caps will keep the pipe from slipping out unexpectedly.
Testing the brace piece's fit. Its good enough for me! We then tested all of the brace's fit.
 Testing. Testing 1, 2, 3...
 Almost done. We nail the brace pieces into place. They each get a few screws too.
 Nails and screws on the top.
 Nails and screws on the bottom.
 Oooo... pretty...
Almost there.
The finished, but unpainted project! My dad and I admiring our work/adjusting some nails.

Woah! Now you've got this cool base. What now? I have the answer, friend. The answer is: Drill the holes for the pipe. Ours are drilled holes are at 12", 18", and 24". This is a prefect training teeter as you can move it from a super low height (12") all the way up to AKC competition height (24"). When those holes are drilled, test the pipe for a good fit. It should fit but not be tight. However it also shouldn't be too loose! The pipe needs to rotate without jiggling around in there.

Now get to painting.

 The base is now painted a light blue-grey color. It was left over from painting my room. We had quite a bit left over and this project hasn't even made a dent in gallon of paint we have left.
The holes we drilled. Aren't they nice?
Ta-da! The finished base.

Part 2 of teetering building will be out later this week.

Friday, January 11, 2013

The Lost Days

Good news.

We aren't dead. And we have been practicing. I'm going to pretend like I didn't fall off the edge of the Internet and carry on like usual.

The holidays were really busy, my boyfriend broke up with me, work has been slow, school started, and all my classes are really hard (unpleasant surprise!). Pepper is still a hard worker though. Despite the snow, we have been getting some practice in. In fact, I've had a video ready to go for like 2 weeks! Magical, I know. I've been a little bit stressed so thats why its taken a while for me to get back on board.

Now, since I haven't anymore to say until our next post (prolly like 3 hours from now), on to the video.


Its labeled week 4 because technically we laid off practicing for a week so I figure it is our 4th week of training out of 5 documented weeks. Does that make sense? (No... whatever.)

Pepper was loving the snow. Our jumping weaves are looking pretty good too! You won't see the weaves make an appearance because I was waiting for us to go to class. No sense in training them if our trainer was going to make us do it different. I will leave all the Agility Class talk for next post though. Promise it will be like super duper soon.  :)